Occupying Little Ones While Homeschooling Ideas 1-12
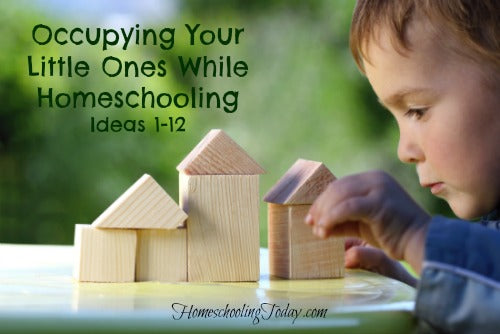
 Occupying toddlers and preschoolers profitably while you focus your attention on schooling older children is a challenge. We began this new school year with seven school-age children (ages fifteen to five), a two-year-old, and a one-year-old. I wondered, “How will we ever accomplish anything and keep the toilet unclogged?”
Activity boxes are one solution (in addition to indispensable flexibility, patience, kindness, and a large dose of humor). We set up five boxes with multiple activities, one for each day of the week and each in a zipper-topped plastic bag, for little ones to use independently during our family’s all-together reading and instruction times. I use the plastic bags with the large white zipper because the press-together style may be too difficult for a young child to close. These provide one to two hours of daily quiet-time activities. Combined with free play in a safe place, assigned playtimes with older siblings, and naptime, we should be able to keep our toddlers and preschoolers busy, productive, and happy throughout the day without quantities of toilet paper that require calls to the plumber.
Assign an older child the task of preparing several activity bags for the coming week. Additionally, entrust the responsibility of refilling used materials to an older child.
Introduce each activity to your child, perhaps at the beginning of the day or on Saturday when you can give your child undivided attention. Although they are self-directed, you should supervise these activities. We place a small carpet or blanket on the floor of the living room where we are reading aloud and ask the child to use one zipper-topped activity bag at a time on the blanket.
For sorting activities, use containers you have on hand, such as recycled tubs (margarine, yogurt, sour cream, or hummus containers), muffin tins (six- and/or twelve-cup styles), ice-cube trays, egg cartons, or disposable paper or plastic cups.
1. Rolling Tube
Materials: Small rubber balls (for children over three) or small cars, empty paper towel tube, several wooden blocks
Instructions: Roll the ball or car through the tube. Experiment with raising one end of the tube to different heights by elevating it with blocks. Create a “stop” with three blocks.
Occupying toddlers and preschoolers profitably while you focus your attention on schooling older children is a challenge. We began this new school year with seven school-age children (ages fifteen to five), a two-year-old, and a one-year-old. I wondered, “How will we ever accomplish anything and keep the toilet unclogged?”
Activity boxes are one solution (in addition to indispensable flexibility, patience, kindness, and a large dose of humor). We set up five boxes with multiple activities, one for each day of the week and each in a zipper-topped plastic bag, for little ones to use independently during our family’s all-together reading and instruction times. I use the plastic bags with the large white zipper because the press-together style may be too difficult for a young child to close. These provide one to two hours of daily quiet-time activities. Combined with free play in a safe place, assigned playtimes with older siblings, and naptime, we should be able to keep our toddlers and preschoolers busy, productive, and happy throughout the day without quantities of toilet paper that require calls to the plumber.
Assign an older child the task of preparing several activity bags for the coming week. Additionally, entrust the responsibility of refilling used materials to an older child.
Introduce each activity to your child, perhaps at the beginning of the day or on Saturday when you can give your child undivided attention. Although they are self-directed, you should supervise these activities. We place a small carpet or blanket on the floor of the living room where we are reading aloud and ask the child to use one zipper-topped activity bag at a time on the blanket.
For sorting activities, use containers you have on hand, such as recycled tubs (margarine, yogurt, sour cream, or hummus containers), muffin tins (six- and/or twelve-cup styles), ice-cube trays, egg cartons, or disposable paper or plastic cups.
1. Rolling Tube
Materials: Small rubber balls (for children over three) or small cars, empty paper towel tube, several wooden blocks
Instructions: Roll the ball or car through the tube. Experiment with raising one end of the tube to different heights by elevating it with blocks. Create a “stop” with three blocks.
 2. Spinning a Top
Materials: Purchased or homemade top (cardboard disk with half of a toothpick inserted inside)
Instructions: Learn to spin a top. How long can the child keep the top spinning?
3. Magnetism
Materials: Magnets; small metal objects such as paperclips, washers, coins, and nails; small nonmetallic items such as buttons, a pencil, string, and fabric scraps
Instructions: Find which objects the magnets attract and which they do not.
4. Beanbag Toss
Materials: Beanbags, string approximately three feet long
Instructions: Use the string to form a circle. Stand at a distance and toss the beanbags into the circle. Increase the distance as the child gains proficiency.
5. Lacing Cards
Materials: Purchased lacing cards or heavy cardboard cut into simple shapes with holes punched around the edges, shoestrings or yarn with the end wrapped in masking tape
Instructions: String yarn in and out through the holes.
6. Patterned Beads
Materials: Large wooden beads in a variety of shapes and colors (I found these at a dollar store), drinking straws, glue gun
Instructions: Lacing the beads on a straw, glue beads in two-, three-, and four-colored patterns. Have your child copy the sample patterns with his own straw and beads or make his own.
Originally, I used shoestrings as the lacing material instead of straws. After my two-year-old did his best imitation of David slaying Goliath with his sling, we decided straws were safer and less likely to end in wooden beads flung throughout the room!
7. Hole Punching
Materials: Hole and shape punches, construction paper cut into fourths (3 x 4 inches)
Instructions: Use the punches to press out shapes. Hint: lay a jellyroll pan under your work area to contain the small pieces of paper.
2. Spinning a Top
Materials: Purchased or homemade top (cardboard disk with half of a toothpick inserted inside)
Instructions: Learn to spin a top. How long can the child keep the top spinning?
3. Magnetism
Materials: Magnets; small metal objects such as paperclips, washers, coins, and nails; small nonmetallic items such as buttons, a pencil, string, and fabric scraps
Instructions: Find which objects the magnets attract and which they do not.
4. Beanbag Toss
Materials: Beanbags, string approximately three feet long
Instructions: Use the string to form a circle. Stand at a distance and toss the beanbags into the circle. Increase the distance as the child gains proficiency.
5. Lacing Cards
Materials: Purchased lacing cards or heavy cardboard cut into simple shapes with holes punched around the edges, shoestrings or yarn with the end wrapped in masking tape
Instructions: String yarn in and out through the holes.
6. Patterned Beads
Materials: Large wooden beads in a variety of shapes and colors (I found these at a dollar store), drinking straws, glue gun
Instructions: Lacing the beads on a straw, glue beads in two-, three-, and four-colored patterns. Have your child copy the sample patterns with his own straw and beads or make his own.
Originally, I used shoestrings as the lacing material instead of straws. After my two-year-old did his best imitation of David slaying Goliath with his sling, we decided straws were safer and less likely to end in wooden beads flung throughout the room!
7. Hole Punching
Materials: Hole and shape punches, construction paper cut into fourths (3 x 4 inches)
Instructions: Use the punches to press out shapes. Hint: lay a jellyroll pan under your work area to contain the small pieces of paper.
 8. Button Sort
Materials: A variety of shape and sizes of buttons, sorting containers
I cheated. Rather than collecting buttons, I purchased a container from the discount store. Alternately, thrift-store clothing provides an inexpensive source for many colorful buttons.
Instructions: Sort buttons by color, shape, and/or style.
9. Bumpy Coloring
Materials: Crayons, sandpaper in a variety of grades
Instructions: Color on the sandpaper for a tactile experience.
10. Sticker Fun
Materials: Small stickers, paper plates
Instructions: Decorate paper plates with stickers.
11. Edible Jewelry
Materials: O-shaped cereal such as Cheerios or Fruit Loops, yarn with the end wrapped in masking tape
Instructions: Using lengths of yarn, tie one end to a piece of cereal to provide an anchor. Thread cereal on the yarn to make necklaces and bracelets. (Do not use this activity too near lunchtime.)
12. Cotton Ball Treasure Hunt
Materials: A medium-size container; cotton balls; small objects to hide, such as buttons, old jewelry, and sequins
Instructions: Layer cotton balls and small objects in a container. Go on a treasure hunt through the cotton balls.
For ideas 13-25 click HERE!
8. Button Sort
Materials: A variety of shape and sizes of buttons, sorting containers
I cheated. Rather than collecting buttons, I purchased a container from the discount store. Alternately, thrift-store clothing provides an inexpensive source for many colorful buttons.
Instructions: Sort buttons by color, shape, and/or style.
9. Bumpy Coloring
Materials: Crayons, sandpaper in a variety of grades
Instructions: Color on the sandpaper for a tactile experience.
10. Sticker Fun
Materials: Small stickers, paper plates
Instructions: Decorate paper plates with stickers.
11. Edible Jewelry
Materials: O-shaped cereal such as Cheerios or Fruit Loops, yarn with the end wrapped in masking tape
Instructions: Using lengths of yarn, tie one end to a piece of cereal to provide an anchor. Thread cereal on the yarn to make necklaces and bracelets. (Do not use this activity too near lunchtime.)
12. Cotton Ball Treasure Hunt
Materials: A medium-size container; cotton balls; small objects to hide, such as buttons, old jewelry, and sequins
Instructions: Layer cotton balls and small objects in a container. Go on a treasure hunt through the cotton balls.
For ideas 13-25 click HERE!