Family Math: Crafty Geometry
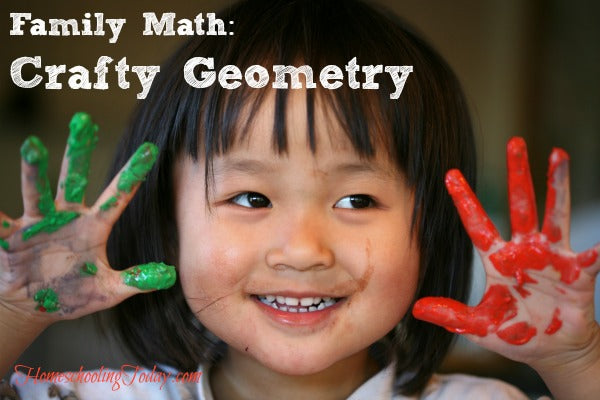
Crafting Finger Paint
This easy recipe holds up well for crafts:- ¼ cup cornstarch
- 1 ¾ cup water
- ½ teaspoon liquid dish detergent
- Acrylic craft paint or gel food coloring (more color options with acrylic craft paint)
Mix the cornstarch and ¼ cup water.
Boil remaining water and add slowly to mixture, beating well.
Mix in the detergent. Cover and cool completely.
Add coloring. (This recipe makes enough for several colors.)
Spoon some finger paint onto unlined white paper. Then cut thin cardboard into rectangles about 4 inches long and varying in width from ½ inch to 2 inches, and use them to pull the paint down in straight or wiggly lines. You can also use a fork or comb to make parallel lines; corks, bottle caps, or lids for circles; or look for other items to make interesting shapes and textures. Now let’s transfer this into a math project!Project 1: Building Math Vocabulary
To understand geometry, a child needs a good grasp of terms. Finger paint is a great alternative to worksheets and drill. As your children create shapes and patterns, discuss their work using geometric terms. Shapes (circle, square, triangle, pentagon, hexagon, quadrilateral, trapezoid, etc.) Lines (parallel, perpendicular, intersecting, horizontal, vertical, diagonal, ray, segment, etc.) Angles (right angle, vertex, complementary, supplementary, acute, obtuse, etc.) Circles (radius, diameter, circumference, chord, secant, tangent, arc, sector, etc.) General terms (point, line, curve, congruent, equivalent, similar, consecutive, equilateral, exterior, interior, bisect, etc.) Use terms appropriate to each child’s level, but it doesn’t matter if the terms are new. For example, have him draw parallel horizontal lines and make vertical or perpendicular lines intersecting them. Then point out the right angles that he formed. With older children, encourage a variety of angles and talk about whether they are acute or obtuse. You can use the finger-paint paper like a whiteboard and erase and redraw as necessary. When you complete the finger-paint decorating, let the paper dry thoroughly. Flatten it by ironing on the unpainted side or putting it under heavy books.Project 2: Gifts—Measurement and Area
After the paper is dry and flat, you can make gifts and wrapping paper. The decorated paper can cover pencils or pens, cans or jars for pencil holders or decorative containers, or pads of paper. Use heavier paper to make cards or bookmarks. Use lighter paper for wrapping paper. Bookmarks and note cards work well for younger children to practice measurement. Help them measure and cut out rectangles of the decorated paper (a good size is 1½ x 6 inches for bookmarks or 4½ x 7 inches for note cards), and then a second rectangle ½ inch longer and ½ inch wider from cardstock. Center the finger-painted paper over the cardstock rectangle and glue it down. (For note cards, it is helpful to fold both papers in half before gluing.) A narrow ribbon glued over the edge of the decorated paper can hide any uneven cutting. As they are working, older children can calculate the area of each rectangle. If they are going to add ribbon, have them calculate the decorated paper’s perimeter to find out how much ribbon they need. You can also have them calculate or estimate how many items they can cut from each sheet of decorated paper or how many sheets of paper they need for a set of covered items. For additional math practice, you can do all measurements using the metric system instead of customary units. To cover a pad of paper, cut a piece of cardboard the same size as the pad and cut a piece of decorated paper 2 inches longer and 2 inches wider than the pad. Glue the cardboard to the underside of the decorated paper, fold, and glue the decorated edges over the cardboard. Then tape the decorated cover to the top of the pad using colored duct or masking tape. Covering pens, pencils, cans, and jars can help a child understand the formula for a cylinder’s surface area. Measure the circumference and height of the object to cover. Cut a rectangle of decorated paper with these measurements (or slightly longer if you want some overlap). Show your children how this rectangle makes a cylindrical shape, so they can calculate part of the surface area of a cylinder using the formula for a rectangle. Then glue the paper to the object.A Merry Heart
The Bible tells us that a merry heart does good like medicine (Proverbs 17:22). Instead of a stressful math time, take time to enjoy your family and create crafts together. Even older children will enjoy them, and you can teach and practice geometric terms and pray for those who will receive your homemade gifts. ****************************Carlita Boyles, an educator, author, and longtime homeschooling mother of three, started her homeschool journey with a master’s degree in special education and twelve years experience teaching public school children with learning disabilities.
Frustrated with textbooks and workbooks, Carlita created a unique approach that she and her husband, John, developed as Math on the Level. This curriculum is designed to help parents teach at each child’s maturation level instead of grade level using practical, real-life activities for the whole family along with individualized instruction and review so parents can teach in the way each child learns best.
*****************************
This article was originally published in the Spring/ Summer 2014 issue of Homeschooling Today. Order your subscription now!
